Disclosure: Some links in this guide are affiliate links. We may earn a small commission at no extra cost to you if you purchase through them.
Quick answer: Prune a bonsai tree in early spring for structural cuts (removing or shortening branches to shape the tree) and pinch new shoots lightly through summer for maintenance pruning. Use sharp concave cutters, never remove more than one third of the foliage in a single session, and seal larger wounds with cut paste to protect the tree.
Why Pruning Matters (and Why You Will Not Kill Your Tree)
Almost every beginner asks the same question before picking up the scissors: “Will pruning kill my bonsai?” The honest answer is no, not if you follow a few simple rules. Healthy bonsai are remarkably forgiving. They have been shaped by humans for centuries precisely because they tolerate cuts well.
Pruning does three things for your tree. It controls the silhouette so the bonsai keeps that miniature, aged appearance. It improves health by removing dead wood and opening the canopy to light and air. And it directs the tree’s energy where you want it, encouraging back-budding and finer ramification closer to the trunk.
If you have not built a basic care routine yet, read our bonsai tree care guide first. A weak tree should never be pruned hard, so your watering and feeding need to be solid before you reach for the cutters.
The Two Types of Bonsai Pruning
Every cut you make on a bonsai falls into one of two categories. Understanding the difference is the single most useful thing a beginner can learn.
Structural (Branch) Pruning
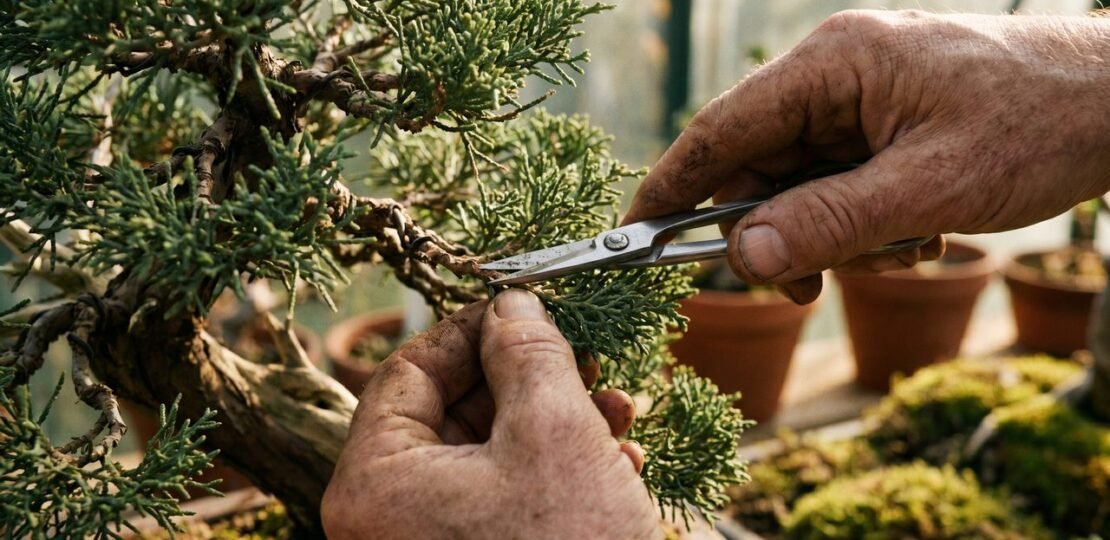
Structural pruning is the big, decisive work. You remove whole branches or shorten thick ones to set the bones of the tree. This is done once or twice a year at most, usually when the tree is dormant or just waking up in spring. Cuts here can be the diameter of a pencil or thicker, so they need clean tools and often a dab of wound paste.
Maintenance (Leaf and Shoot) Pruning
Maintenance pruning is the light, regular work that keeps the silhouette tidy through the growing season. You pinch back new shoots, trim long runners, and remove leaves that are blocking interior light. This happens every couple of weeks from late spring through early autumn on most species.
A useful rule of thumb: structural pruning shapes the tree, maintenance pruning refines it.
When to Prune a Bonsai Tree
Timing matters more than technique. The right cut at the wrong time will set your tree back; the same cut in the correct season will heal in weeks.
- Early spring (before bud break): The main window for structural pruning on deciduous species. Sap is rising, wounds heal quickly, and you can see the branch structure clearly without leaves in the way.
- Late spring through summer: Light pinching and shoot trimming. Let new growth extend a few sets of leaves, then pinch back to the desired length.
- Early autumn: A final tidy cut-back before the tree slows down. Avoid heavy structural work this late.
- Winter: Most species are dormant. Conifers tolerate light structural work, but deciduous trees are better left alone until spring buds begin to swell.
Species differ. Tropical trees like ficus and jade do not have a strict dormancy and can be pruned across a longer window. Flowering species such as those covered in our cherry blossom bonsai guide are pruned after flowering to avoid removing next year’s buds. Yamadori (collected wild trees) need extra caution, which we cover in our yamadori article.
Tools You Need to Prune a Bonsai
You do not need a full studio of equipment to start. Three tools cover almost every cut a beginner will ever make.
Concave cutters are the most important tool you will own. Their curved jaws leave a shallow dish-shaped wound that heals flush with the bark, which is why bonsai trees can hide scars that would be obvious on a regular pruned shrub. We suggest investing in a decent pair from the start, since cheap concave cutters go blunt quickly and tear the wood.
Bonsai scissors handle everything thinner than a pencil: shoots, leaves, fine twigs. A long-handled pair lets you reach inside the canopy without bruising surrounding foliage.
Knob cutters are spherical-jawed cutters that scoop out a small hollow when removing stubs or chunks of trunk. Not essential on day one, but you will want a pair once you start removing thicker branches.
| Tool | Purpose | Where to Buy |
|---|---|---|
| Concave cutters | Clean removal of branches up to 1 cm thick, leaves a healing dish-shaped wound | (affiliate link) |
| Bonsai scissors | Trimming shoots, leaves, and fine twigs | (affiliate link) |
| Knob cutters | Removing stubs and reducing thick branch collars | (affiliate link) |
Sharpen your tools after every few sessions and wipe the blades with rubbing alcohol between trees to avoid spreading disease.
Step-by-Step: How to Prune a Bonsai Tree
Work slowly. A pruning session on a small bonsai should take twenty to thirty minutes, not two minutes. Step back often and look at the tree from all sides.
Step 1: Assess the Silhouette
Place the bonsai at eye level on a turntable or a sturdy box. Walk around it. Identify the front (usually the side with the best surface roots and trunk movement), the apex, and the rough triangular outline you want to keep. Take a photo if it helps. You are not cutting yet, just looking.
Step 2: Remove Dead and Diseased Branches First
Snap off any obviously dead twigs and cut back diseased growth to healthy wood. This clears the picture and reduces the chance of infection spreading. These cuts almost never harm the tree because the wood is already lost.
Step 3: Identify Primary Versus Crowding Branches
Look at each main branch leaving the trunk. Keep the primary structural branches, the ones that build your design. Mark for removal: branches growing straight up or straight down from a main branch, branches crossing through the trunk line, two branches emerging from the same point on the trunk (one of the pair must go), and any branch that disrupts the triangular silhouette.
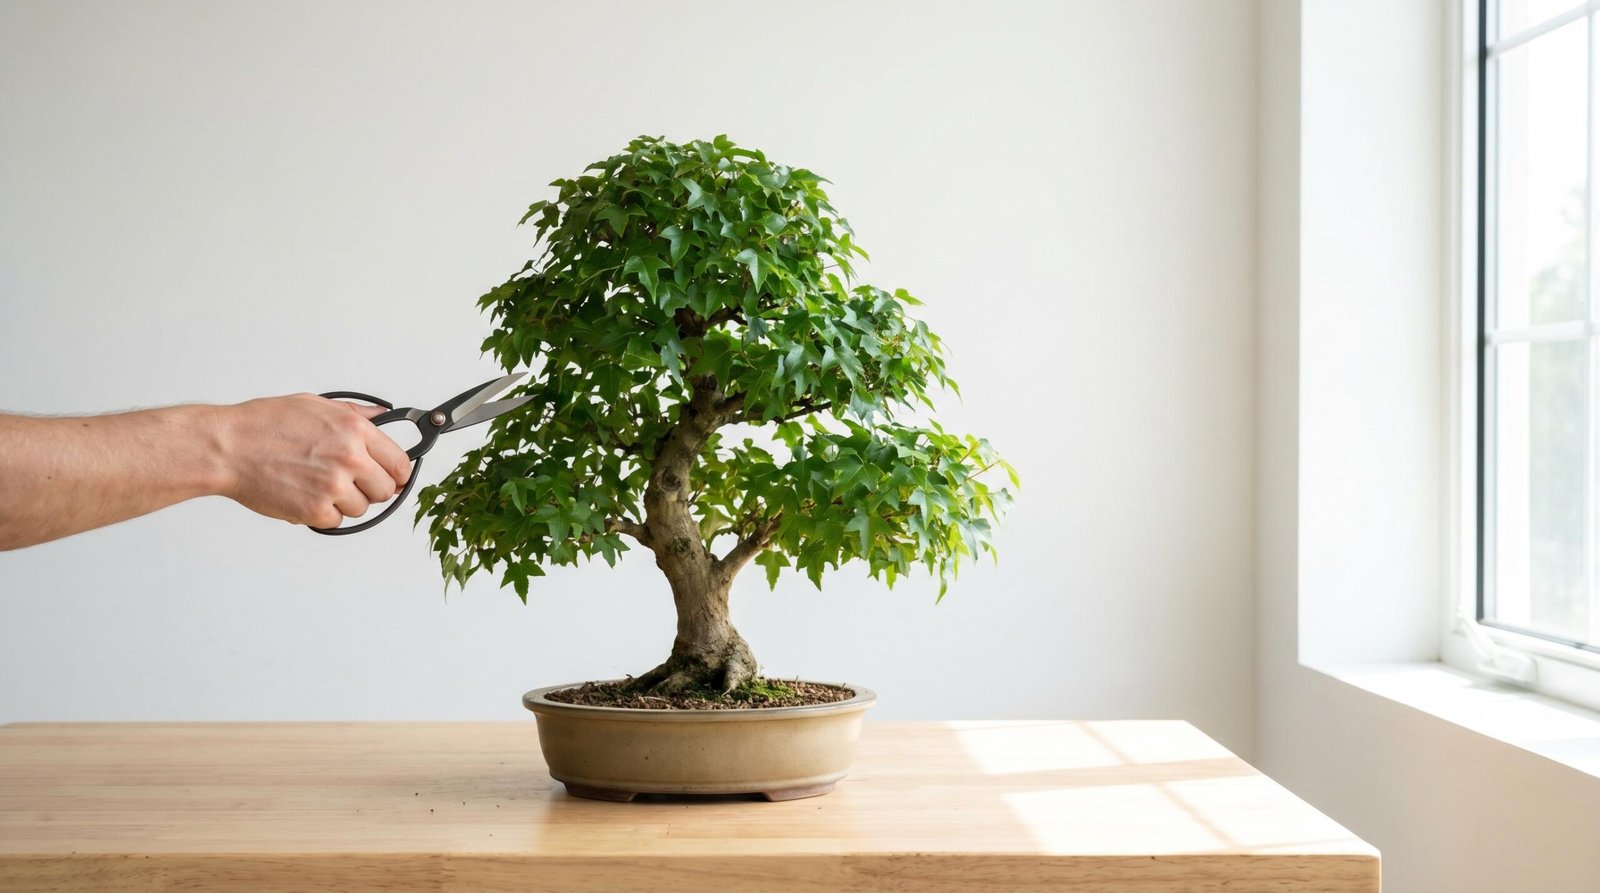
Step 4: Make Clean Cuts at the Right Angle
Position the concave cutter so the curved face sits flush against the trunk or parent branch. Squeeze firmly in one motion; do not saw or twist. The aim is a slight hollow that the bark will roll over and close. For shoot trimming with scissors, cut just above an outward-facing bud so new growth pushes the silhouette outward.
Step 5: Apply Wound Paste on Larger Cuts
Any cut wider than a pencil benefits from cut paste. Smear a thin layer across the exposed wood. This keeps the wound moist, blocks pathogens, and speeds the rolling of new bark across the scar. Small twig cuts do not need sealing.
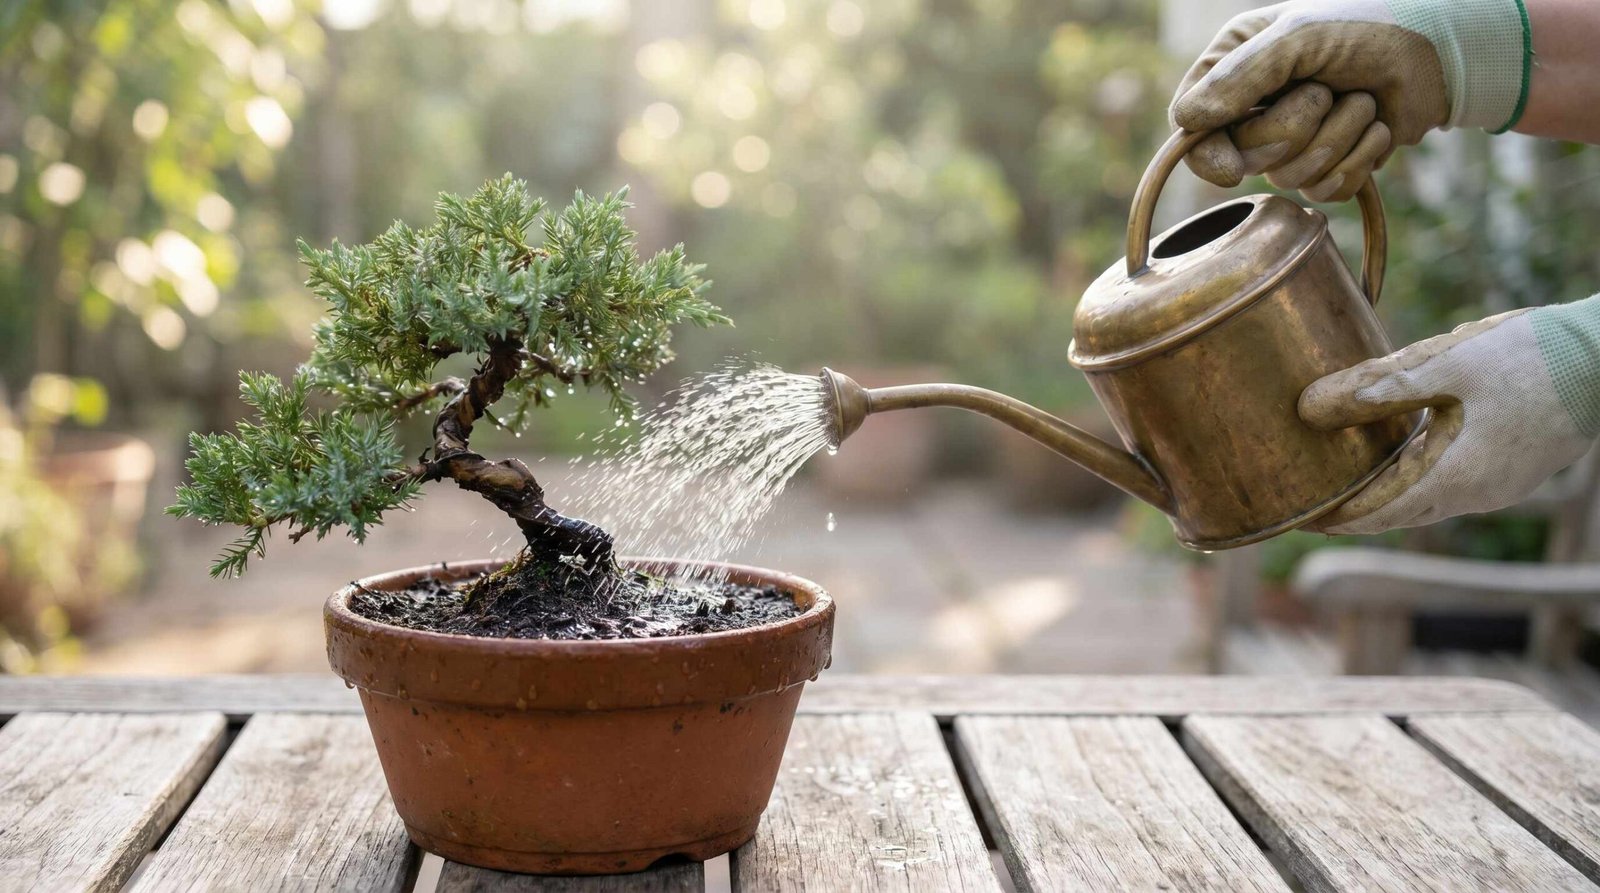
Step 6: Aftercare
Move the tree to a sheltered spot out of direct sun for twenty-four hours. Water lightly, since a reduced canopy means the tree drinks less. Hold off on fertilizer for two weeks so the tree spends energy healing rather than pushing fresh growth. After a fortnight, resume normal feeding and watch for back-buds, the small new shoots that appear closer to the trunk after a successful prune.
Species-Specific Pruning Rules
Different species respond to different timing and styles of cut. Use this table as a starting point and adjust to your climate.
| Species | Best Pruning Season | Structural Pruning | Pinching Frequency | Notes |
|---|---|---|---|---|
| Juniper | Late summer to autumn | Once a year, autumn | Pinch new growth weekly in summer | Never use scissors on foliage pads; pinch with fingers to avoid brown tips |
| Ficus | Late spring to summer | Year-round indoors, best in warm months | Every 2 to 3 weeks during active growth | Bleeds milky sap; seal cuts to stop dripping |
| Jade | Spring | Once a year | Light, monthly | Let cuts dry in open air for a day before watering to prevent rot |
| Chinese Elm | Early spring and again mid-summer | Twice a year | Every 2 weeks in growing season | Very forgiving; a good first tree for practicing pruning |
| Japanese Maple | Late winter before bud break | Once a year, late winter | Pinch new shoots in spring only | Avoid summer cuts; sap bleeding is heavy and weakens the tree |
For a deeper look at advanced techniques on individual species, Bonsai Empire’s pruning guide covers more technical refinements once you are comfortable with the basics.
Common Pruning Mistakes to Avoid
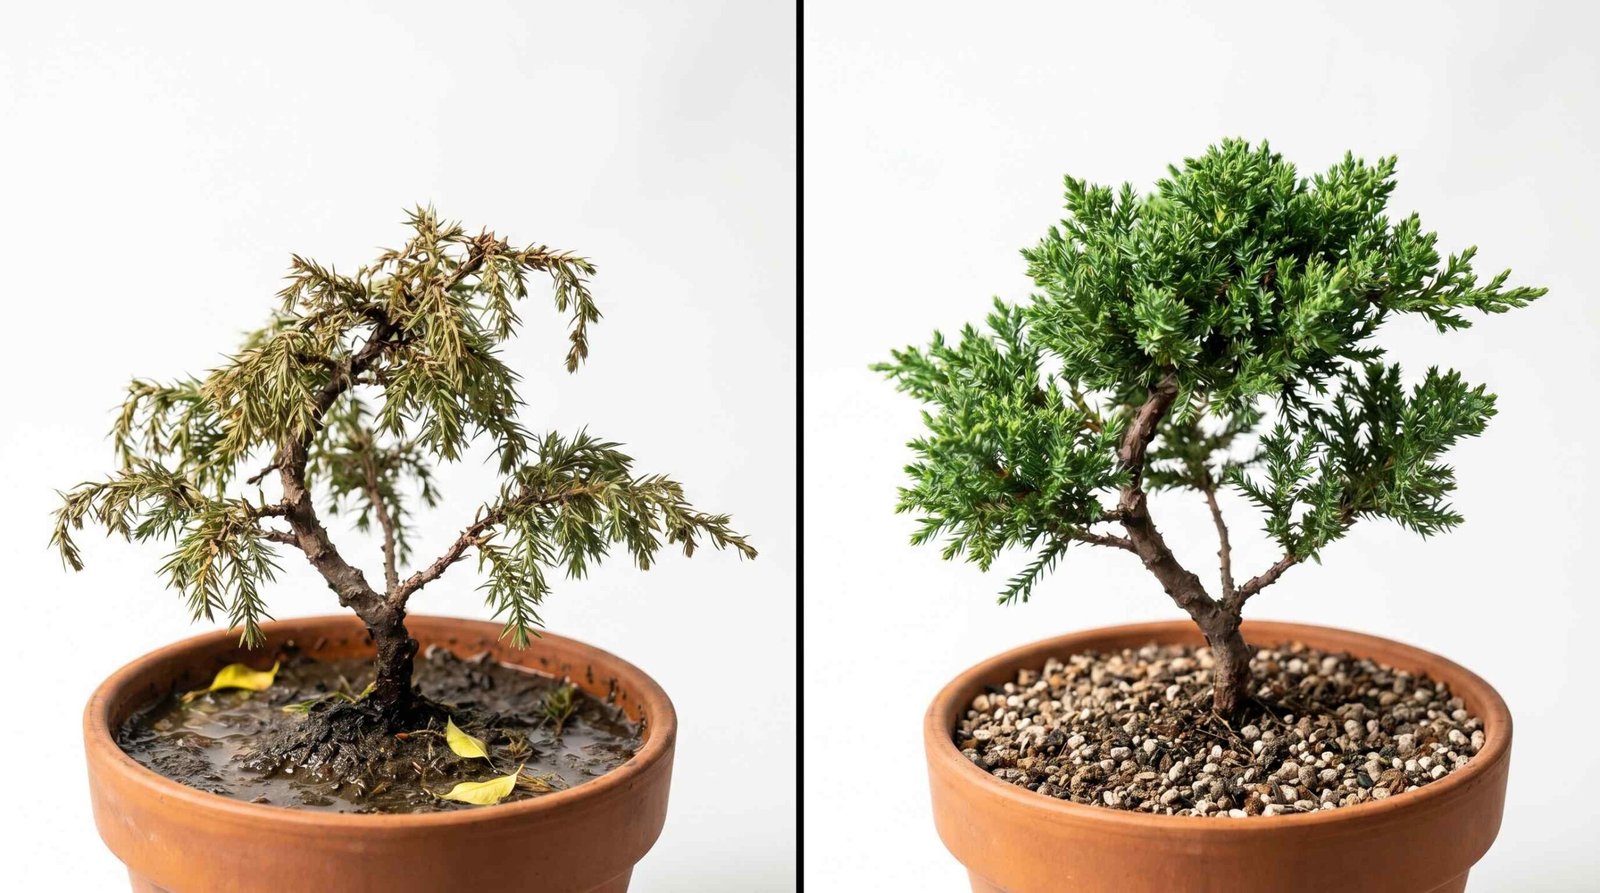
- Cutting too much at once. Never remove more than one third of the foliage in a single session. Beginners often get scissor-happy and strip the tree, which can starve it of energy and trigger dieback.
- Pruning in the wrong season. Heavy cuts on a Japanese maple in midsummer cause heavy sap bleeding. The same cut in late winter heals quietly. Match the work to the calendar.
- Using blunt tools. A dull blade crushes and tears the wood, leaving a wound that struggles to heal. If your scissors squeak or fold a thin shoot rather than slicing it, sharpen them before continuing.
- Skipping wound paste on thick cuts. A pencil-thick or larger wound left open invites fungal infection and dies back into the trunk. Always seal big cuts.
- Removing the apical leader by accident. The leader is the topmost shoot that drives upward growth. Cutting it off without intention flattens the tree’s silhouette and can take years to rebuild.
Frequently Asked Questions
Can you prune a bonsai in winter?
Light structural pruning on dormant conifers is fine in mid-winter, especially in mild climates. Deciduous trees are better pruned in late winter, just as the buds begin to swell, so the tree can immediately push healing tissue around the wound. Avoid heavy cuts during deep frost.
How much can you cut off a bonsai at once?
One third of the total foliage is the safe upper limit for a healthy tree in the correct season. On weaker or recently repotted trees, stick to a tenth or less, or skip the session entirely until vigor returns.
Do you need to seal bonsai cuts?
Anything wider than a pencil benefits from cut paste. Smaller twig wounds heal on their own. Sealing is most important on species that bleed sap heavily, such as Japanese maple and ficus.
Will my bonsai grow back if I prune too much?
In most cases, yes. A vigorous tree will push new buds along the remaining branches and even from the bare trunk, a process called back-budding. Recovery takes a full growing season. Give the tree extra sunlight, regular water, and a light feeding once new shoots appear.
Should I prune and repot in the same year?
We suggest spacing the two operations apart by at least six weeks. Both are stresses on the tree, and stacking them can drain its reserves. Repot in early spring, let the tree recover, then prune lightly in late spring or early summer.
What is the difference between pinching and pruning?
Pinching is a form of maintenance pruning done with your fingertips. You squeeze off the soft tip of a new shoot before it hardens. It is gentler than cutting with scissors and is the standard technique for junipers and pines, where blade cuts cause brown foliage.
RELATED POSTS
View all