Bonsai Styles Explained: All 20+ Classic Forms (With Difficulty Ratings)
Walk into any bonsai exhibition and you’ll see trees that look windblown across a cliff, others standing arrow-straight like temple pines, and a few that cascade downward as if growing off a mountainside. These aren’t random shapes. Each one is a recognized bonsai style with centuries of history, specific rules, and a difficulty level that matters a lot when you’re just starting out.
Bonsai styles are traditional shapes that mimic how trees grow in nature, each defined by trunk angle, branch pattern, and overall silhouette. The five core styles are Formal Upright (Chokkan), Informal Upright (Moyogi), Slanting (Shakan), Broom (Hokidachi), and Semi-Cascade (Han-kengai). Most beginners start with informal upright because its gentle curve is forgiving and works across many species.
This guide covers every classic bonsai style you’ll encounter, rates each by difficulty, tells you which species work best for it, and walks you through how to pick the right style for the tree you actually have in front of you. If you’re brand new to the hobby, pair this with our general bonsai care guide so you understand the watering and feeding fundamentals before you commit to any styling work.
How Bonsai Styles Developed
Every classic style traces back to something a Japanese practitioner once saw on a mountainside, in a forest, or clinging to a windswept cliff. A pine growing straight up in a sheltered grove inspired Chokkan, the formal upright. A juniper bent sideways by years of seaside wind inspired Fukinagashi, the windswept style. A tree that survived a landslide by stretching its trunk down a slope inspired Kengai, the full cascade.
The Japanese names encode the shape. Chokkan literally means “straight trunk.” Moyogi suggests “pattern” or “informal” curve. Kengai translates to “hanging cliff.” Knowing this makes the styles much easier to remember, because each name is a direct description of what the tree looks like.
Understanding the natural origin of each style helps you in a practical way too. When you’re styling a tree, you’re not just following arbitrary rules. You’re trying to replicate the way trees actually respond to wind, gravity, terrain, and erosion. The Brooklyn Botanic Garden classifies the major styles by these natural inspirations, and once you see a tree growing in the wild that looks like a Shakan or a Bunjingi, the whole categorization clicks into place.
The Five Core Styles – Where Every Beginner Starts
If you’re starting your first tree, focus on these five. They cover the vast majority of what you’ll see at any beginner-level exhibition, work with the most forgiving species, and teach you the foundational skills that transfer to every other style.
Formal Upright (Chokkan) – Beginner
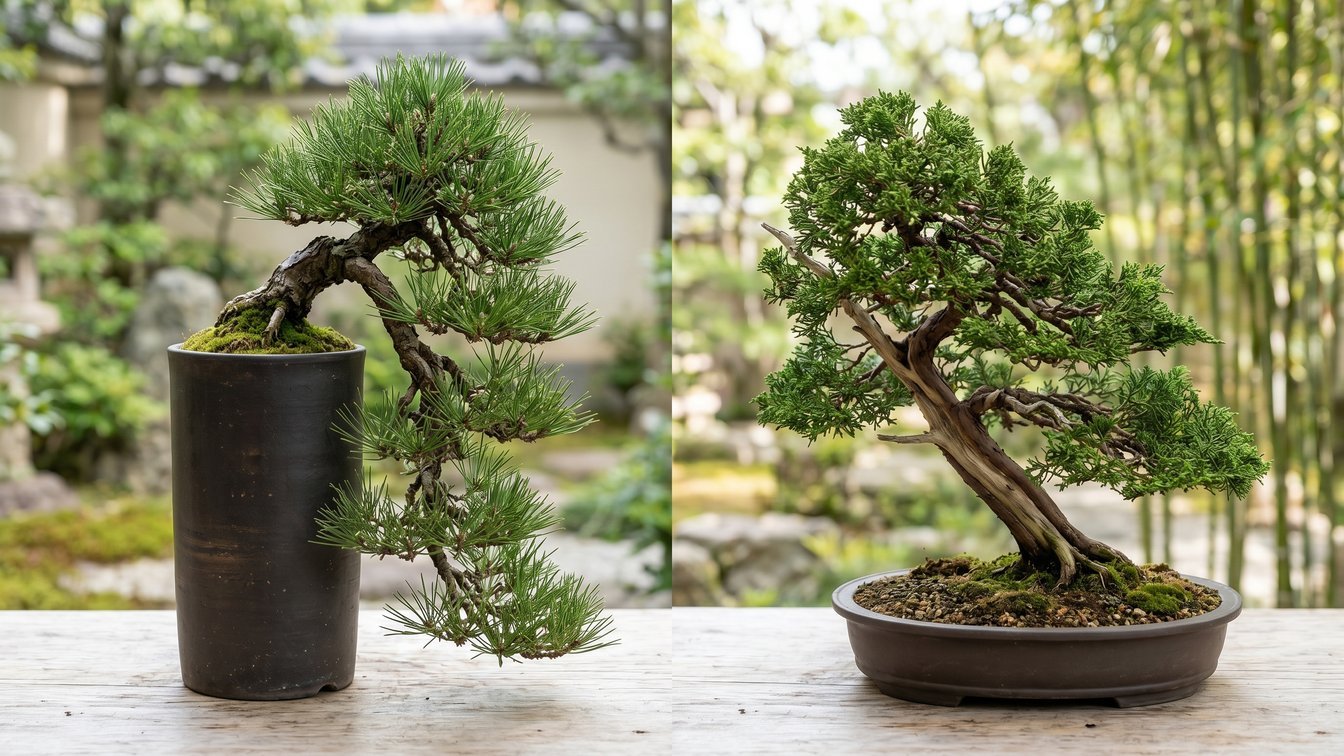
The Chokkan is a perfectly straight trunk that tapers smoothly from a wide base to a fine apex. Branches alternate left, right, and back as they ascend, getting shorter and finer toward the top, creating a triangular silhouette. This is the style you picture when someone says “bonsai” without context.
Formal upright works best with conifers that naturally grow this way, particularly juniper bonsai, Japanese black pine, Japanese white pine, and spruce. The straight trunk is unforgiving of mistakes, so you need a young tree with a genuinely straight base or you’ll fight the shape forever. Maintaining the clean triangular silhouette comes down to consistent pruning to shape the branches into proportional layers.
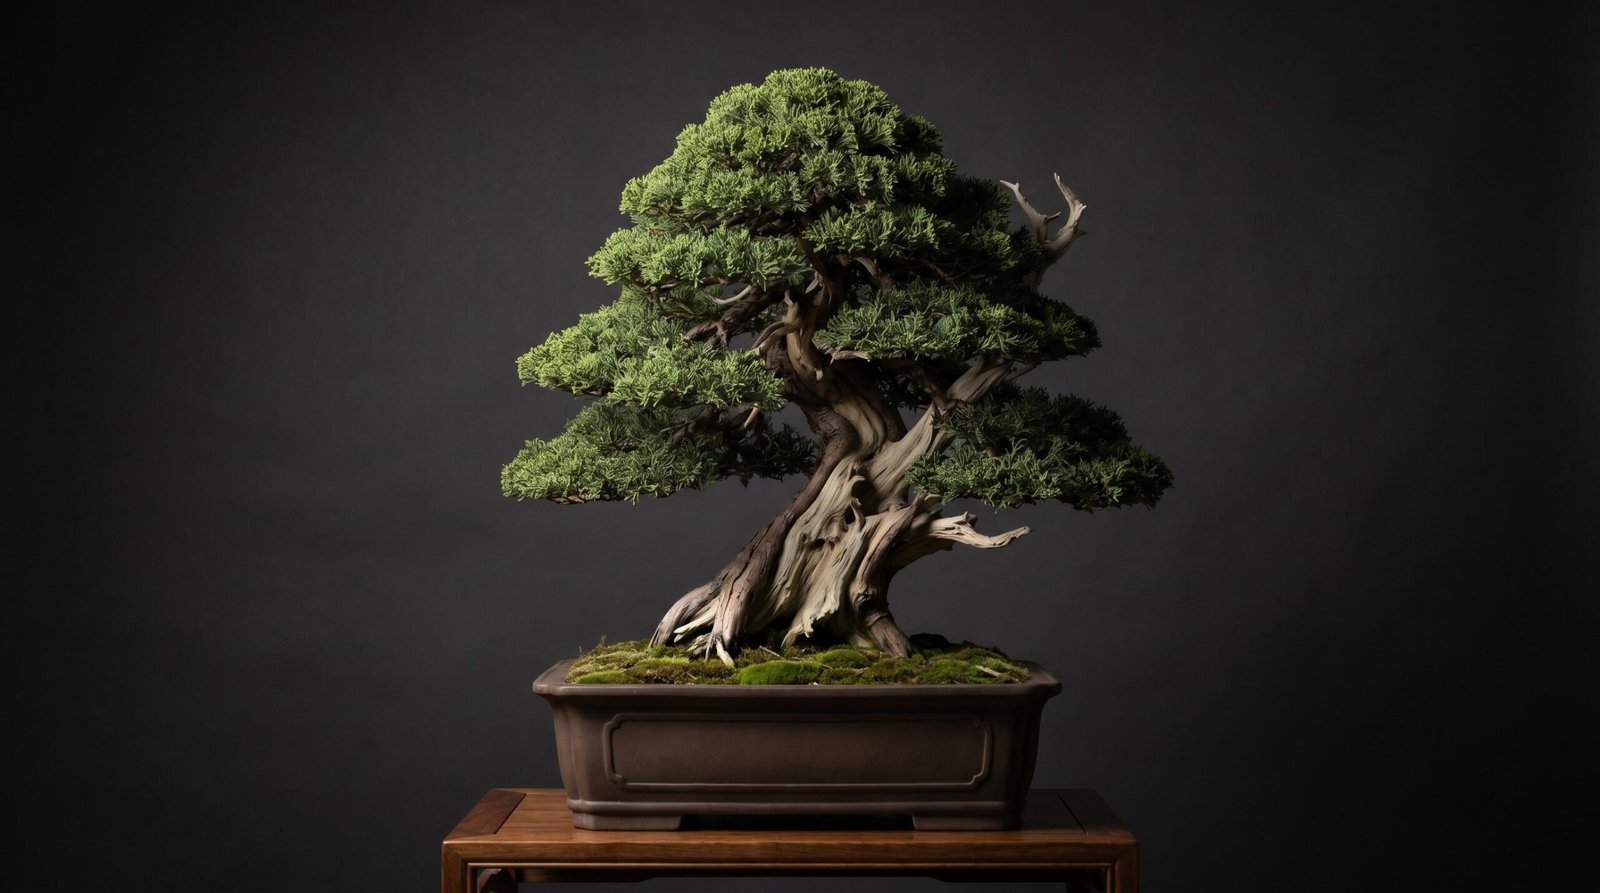
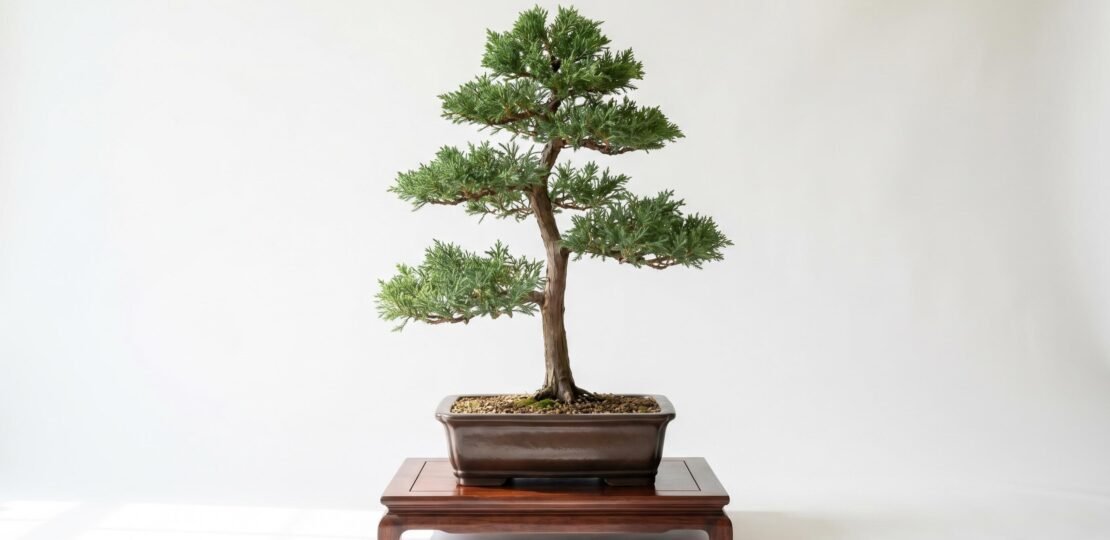
Informal Upright (Moyogi) – Beginner
Moyogi is what most beginners end up with whether they plan to or not. The trunk grows generally upward but moves in soft S-curves, with branches positioned at the outside of each curve. The apex sits directly above the base, even though the trunk takes a winding route to get there.
This is the most forgiving style in the entire repertoire. Almost any species takes well to it, including Chinese elm, ficus, Japanese maple, trident maple, and most junipers. The natural curve hides minor flaws, accommodates almost any starting material, and looks fantastic at every stage of development. We suggest most first-time bonsai growers aim for informal upright unless their tree clearly demands something else.
Slanting (Shakan) – Beginner to Intermediate
The Shakan has a trunk that leans at roughly 60 to 80 degrees from vertical, with strong surface roots on the side opposite the lean to visually anchor the tree. The branches still grow outward and upward in a balanced pattern, but the whole composition tilts as if the tree is bracing against a steady wind.
Junipers, pines, and ficus all work well here. The slanting style is your best option when you have a tree whose trunk already leans naturally, because forcing a straight trunk to lean (or a leaning trunk to straighten) is much harder than working with what the tree gives you. The lean is typically established and refined through careful bonsai wiring on the trunk and main branches.
Broom (Hokidachi) – Beginner (deciduous only)
The broom style features a perfectly straight trunk that suddenly branches out into a dense, dome-shaped canopy, like an upside-down broom or a wineglass turned upside down. The branches divide and subdivide many times, creating a fine ramification that looks spectacular in winter when the leaves are gone.
Hokidachi only works with deciduous species, and the king is the Japanese zelkova. Chinese elm, Japanese hornbeam, and Japanese maple also produce excellent broom-style trees. The hardest part isn’t the trunk, it’s developing the dense branching, which takes years of patient pinching and pruning. Because the shape relies entirely on branch density, regular pruning technique is what makes or breaks a broom-style tree.
Semi-Cascade (Han-kengai) – Intermediate
In semi-cascade, the trunk grows upward briefly then bends sharply and grows out and slightly downward, with the lowest branch falling below the rim of the pot but never below the bottom of the pot itself. The composition suggests a tree growing on a riverbank or rocky overhang, reaching out over water.
Junipers are the classic choice, along with cotoneaster, wisteria, and certain pines. We rate this intermediate rather than beginner because the downward growth direction is unnatural for most trees. The branches you want to keep alive are working against gravity, which means you have to be careful with sun exposure and pruning so the upper portion of the tree doesn’t outcompete the cascading section. Building the curve requires committed wiring work over multiple seasons.
Beyond the Basics – Intermediate and Advanced Styles
Once you’ve kept a tree alive for two or three years and developed a feel for how branches respond to wiring and pruning, these styles open up. They’re not harder to look at, they’re harder to execute, because each one fights against the tree’s natural inclinations in some way.
Full Cascade (Kengai) – Intermediate
Full cascade takes the semi-cascade idea further. The trunk emerges from the soil, bends sharply, and grows downward past the bottom of the pot, often reaching well below the display stand. The apex points down, not up, which is the most dramatic visual statement in all of bonsai.
This style demands a tall, narrow pot to provide the height the cascading trunk needs. Junipers, especially shimpaku and procumbens, are the classic choice. Cotoneaster, pyracantha, and certain pines also work. Cascade styling is achieved through patient wiring over years, gradually training the trunk and primary branches to grow against gravity.
Windswept (Fukinagashi) – Intermediate
The windswept style depicts a tree shaped by constant wind from one direction, with all the branches swept to one side as if the tree is permanently leaning into a gale. The trunk may be upright or slanted, but every branch grows in the same direction, often with dead deadwood on the windward side.
Junipers, pines, and tamarisk work beautifully here. Fukinagashi is harder than it looks because you need every branch to commit to the same direction without making the tree look like a one-sided mess. The shape is built almost entirely through wiring, and you’ll want quality essential bonsai tools including good wire cutters and concave branch cutters to manage the directional pruning.
Literati (Bunjingi) – Intermediate to Advanced
Literati style is the bonsai world’s elegant rebel. The trunk is tall, slender, and curving, with most branches stripped away to leave only a sparse, asymmetric crown near the top. The composition feels like a brushstroke, suggesting an old tree that has shed everything inessential.
Japanese white pine, Japanese black pine, and certain junipers excel as literati. The challenge is restraint. Most beginners can’t resist adding more branches, more foliage, more visual weight, but Bunjingi succeeds because of what’s missing. As Longwood Gardens explains, literati emerged from the painting traditions of Chinese scholars, and the style retains that sparse, calligraphic quality.
Twin Trunk (Sokan) – Intermediate
Sokan features two trunks rising from a single root system, typically with one trunk noticeably taller and thicker than the other. The two trunks lean slightly apart so each has its own visual space, but they share the same nebari and read as one composition.
Junipers, pines, maples, and Chinese elm all work. The trick is balancing the two trunks so neither overwhelms the other while keeping them clearly different. A perfectly symmetrical twin trunk looks artificial. The asymmetry is what makes the style work, mirroring how twin trunks actually grow in nature when a single tree splits low or two seeds germinate together.
Forest / Group Planting (Yose-ue) – Intermediate to Advanced
A forest planting uses an odd number of trees, usually five, seven, nine, or more, arranged in a single shallow container to create the impression of a small grove. The largest tree sits forward and slightly off-center, with progressively smaller trees behind and to the sides, building depth and perspective.
Japanese maple, trident maple, Chinese elm, and Japanese larch make outstanding forest plantings. Yose-ue is harder than it sounds because you’re managing a small ecosystem rather than a single tree. The trees must complement each other in age, taper, and movement, and they all need to thrive in the same shallow soil. We suggest beginners try a three-tree planting first as practice before attempting a full forest.
Raft (Ikadabuki) – Advanced
Raft style imitates a fallen tree whose original trunk now lies horizontally along the soil, with the former branches growing upward as new trunks. The visual effect is a row of trees that are actually one tree, sharing a single root system along a buried trunk.
Junipers and pines that root readily from branches are the typical choices. Raft styling is advanced because creating it requires laying a tree on its side, partially burying the trunk, encouraging the branches to send down new roots, and then training each former branch as an independent trunk. The whole process takes years before the result looks convincing.
Root-over-Rock (Sekijoju) – Advanced
In Sekijoju, the tree’s roots wrap dramatically over a rock before disappearing into the soil below, suggesting a tree that germinated on top of a boulder and sent its roots searching for ground. The rock is part of the composition, not a decoration.
Trident maple is the iconic species for this style because its roots fuse and thicken in a way that grips rocks beautifully. Japanese maple, ficus, and Chinese elm also work. The setup process can take three to five years of careful root training, often with the roots wrapped against the rock and the whole assembly buried until the roots have fused to the stone surface.
Driftwood (Sharimiki) – Advanced
Sharimiki features extensive deadwood along the trunk, with strips of bare, weathered wood (called shari) running alongside the living vein that keeps the tree alive. The effect suggests an ancient tree that has survived lightning, fire, or centuries of harsh weather while still pushing out living foliage.
Junipers are the gold standard for driftwood styling because their deadwood weathers to a pale, sculptural finish that contrasts beautifully with the living bark. Yamadori (collected mountain trees) often provide the best raw material because nature has already done much of the carving. The technique requires sharp tools, lime sulfur to preserve the deadwood, and a steady hand for the carving work.
Bonsai Styles at a Glance – Comparison Table
Here’s every style covered above in one reference table. Bookmark this and come back to it whenever you’re evaluating a new tree or planning your next styling project.
| Style Name | Japanese Name | Difficulty | Key Visual Trait | Best Species |
|---|---|---|---|---|
| Formal Upright | Chokkan | Beginner | Perfectly straight, tapered trunk with triangular silhouette | Juniper, Japanese black pine, Japanese white pine, spruce |
| Informal Upright | Moyogi | Beginner | Gentle S-curves with apex over the base | Chinese elm, ficus, Japanese maple, juniper, trident maple |
| Slanting | Shakan | Beginner to Intermediate | Trunk leans 60-80 degrees with strong opposite roots | Juniper, pine, ficus |
| Broom | Hokidachi | Beginner (deciduous only) | Straight trunk with dome-shaped, densely branched canopy | Japanese zelkova, Chinese elm, Japanese hornbeam, Japanese maple |
| Semi-Cascade | Han-kengai | Intermediate | Trunk grows out and down, lowest branch below pot rim | Juniper, cotoneaster, wisteria, certain pines |
| Full Cascade | Kengai | Intermediate | Apex descends below the base of the pot | Shimpaku juniper, procumbens juniper, cotoneaster, pyracantha |
| Windswept | Fukinagashi | Intermediate | All branches swept to one side as if by constant wind | Juniper, pine, tamarisk |
| Literati | Bunjingi | Intermediate to Advanced | Tall, sparse, curving trunk with minimal asymmetric crown | Japanese white pine, Japanese black pine, juniper |
| Twin Trunk | Sokan | Intermediate | Two trunks from one root system, asymmetric in size | Juniper, pine, Japanese maple, Chinese elm |
| Forest / Group Planting | Yose-ue | Intermediate to Advanced | Odd number of trees arranged for depth and perspective | Japanese maple, trident maple, Chinese elm, Japanese larch |
| Raft | Ikadabuki | Advanced | Horizontal buried trunk with multiple vertical trunks rising from it | Juniper, pine, certain ficus |
| Root-over-Rock | Sekijoju | Advanced | Roots gripping a rock before entering the soil | Trident maple, Japanese maple, ficus, Chinese elm |
| Driftwood | Sharimiki | Advanced | Extensive bleached deadwood alongside living veins | Juniper (especially shimpaku), yamadori-collected specimens |
How to Choose the Right Style for Your Tree
Every guide tells you what the styles look like. Almost none tell you how to decide which one to actually use. That’s the question that matters when you’re standing over a young tree at the nursery wondering what shape it could become. Here’s the framework we use.
Read your trunk first
The trunk has more authority than you do. Before you pick a style, look at how the trunk already grows. A perfectly straight trunk wants to be formal upright. A trunk with a slight, gentle curve wants to be informal upright. A trunk that leans noticeably to one side wants to be slanting. A trunk that grows nearly horizontally wants to be semi-cascade or full cascade. A trunk that’s tall, thin, and curvy wants to be literati.
Trying to override the trunk’s natural direction is the most common beginner mistake. You can refine and exaggerate what’s already there, but you can’t fundamentally change a trunk’s character without years of work and significant risk to the tree. Read what the trunk is telling you, then pick a style that amplifies that message.
Match style to species temperament
Different species have different strengths. Juniper bonsai are workhorses that take well to almost every style but particularly shine in cascades, windswept, formal upright, and driftwood because their flexible branches and dramatic deadwood support those expressive shapes. Ficus is best for broom, informal upright, and indoor-friendly displays where you need a forgiving tropical. Japanese maple wants to be informal upright, forest, or root-over-rock, because its delicate foliage and elegant branching look best in compositions that emphasize lightness.
Pines, particularly Japanese black and Japanese white pine, are made for formal upright and literati. Their needles, bark, and growth habit evoke the mountain-dwelling trees that inspired both styles. Trident maple excels at root-over-rock and broom because of how its roots and branches respond to training. Chinese elm is the great generalist, accepting formal upright, informal upright, broom, and forest with equal grace, which is why it’s the most-recommended starter species in the world.
Consider your experience level
Be honest about where you are. If this is your first or second tree, stick to the core five styles. Pick informal upright unless your tree clearly demands something else, give yourself a year or two to develop your wiring and pruning instincts, and then expand from there. Beginners who jump straight to cascade or literati usually kill their tree, get frustrated, and quit the hobby.
Once you’ve kept a tree healthy through multiple growing seasons and feel confident with wiring, try windswept or literati. These intermediate styles teach you to commit to a strong visual direction, which prepares you for the advanced work. Save raft, root-over-rock, and full driftwood for when you’ve already styled several trees successfully. These advanced techniques reward patience and punish impatience, and you’ll appreciate them far more when you have enough experience to actually pull them off.
FAQ
What are the 5 basic bonsai styles?
The five basic bonsai styles are Formal Upright (Chokkan), Informal Upright (Moyogi), Slanting (Shakan), Broom (Hokidachi), and Semi-Cascade (Han-kengai). These cover almost everything a beginner needs to know and form the foundation that every other style builds on. Most starter trees you buy at a nursery are heading toward one of these five. We suggest learning all five before exploring intermediate or advanced styles, because the skills transfer directly.
Which bonsai style is easiest for beginners?
Informal upright (Moyogi) is the easiest for most beginners. The gentle S-curve trunk works with almost any species, forgives most styling mistakes, and adapts to whatever raw material you start with. Unlike formal upright, which demands a perfectly straight trunk, informal upright lets the tree’s natural growth guide the shape. Almost every famous bonsai master started with this style, and it remains the default choice when no other style is clearly indicated.
Can I change my bonsai’s style later?
Yes, but with limits. You can refine a style, exaggerate certain features, or transition between closely related styles like informal upright to slanting. What you cannot easily do is fundamentally reverse the trunk’s character. A formal upright cannot become a cascade without years of severe training that may kill the tree. Style changes work best when you’re moving in the direction the tree already wants to grow. Be patient and let the tree guide the transition.
What is the most popular bonsai style?
Informal upright (Moyogi) is the most popular bonsai style globally. It dominates beginner collections, intermediate exhibitions, and even many advanced displays because it suits the widest range of species and starting material. The natural-looking curve appeals to both Western and Eastern aesthetic sensibilities, and the style accommodates almost any tree without forcing it into an unnatural shape. If you only ever learn one style, learn this one.
What is literati style in bonsai?
Literati style (Bunjingi) is a tall, slender, curving trunk with sparse foliage concentrated near the top, evoking a brush painting by a Chinese scholar or Japanese poet. It’s defined by what’s missing rather than what’s present, with most lower branches stripped away to emphasize the trunk’s elegant line. Pines and junipers work best for literati. The style is intermediate to advanced because mastering its restraint, where less foliage actually makes the tree more beautiful, takes years to develop an eye for.
How long does it take to style a bonsai tree?
Initial styling can be done in a single session, sometimes just an afternoon of wiring and pruning. But refining a tree into a fully developed example of its style takes years and often decades. A young nursery tree might show its intended style within two to three years of consistent work. A show-quality version of any style, especially literati, raft, or root-over-rock, takes ten to thirty years. Bonsai rewards long-term thinking more than almost any other hobby.